No products in the cart.
Dairy Free, Desserts, Easter, Egg Free, Favourites, Featured, GAPS, Gluten Free, Grain Free, Gut Health, Healthy Living, Holidays, Naturally Sweetened, Nut Free, Paleo, Snacks, Thermomix, Wholefood
Easy Marshmallows: Honey Sweetened & All Natural
The other day I decided I really should work out a Thermomix version of honey-sweetened marshmallows to share with my gut health program members for Easter. They’ve been asking for a GAPS-friendly marshmallow recipe for a while! I have made honey-sweetened marshmallows before, but the recipes weren’t designed for the Thermomix, and I wanted a super easy ‘chuck it all in’ method, because that’s my preferred way to cook. 😀
Guess what? It worked!!!! Yahooooooo!!
In my excitement I made the mistake of posting a video on Facebook before I’d finished testing, and got bombarded with frantic pleas for the recipe so I thought I’d better get cracking and test it properly, then get it up on the blog!! I worked madly yesterday and I’m so happy with it.
After a day or so of testing, I have marshmallows coming out of my ears… which may not be such a good idea, as I try to keep the sweet stuff to a minimum around here, or save them for special treats! So some are going into the freezer (maybe if I hide them really well, they’ll last ’til Easter???); and some are being given away. Although I must admit, I kept the rocky road close by.
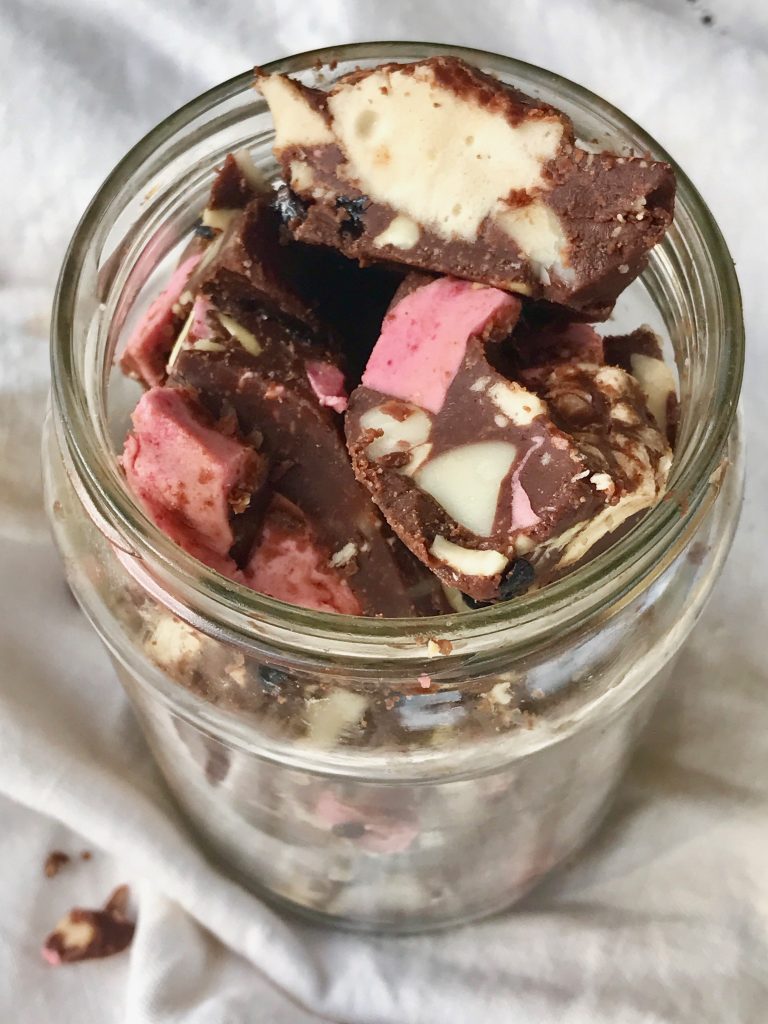
I didn’t think I really cared that much for rocky road. Until I made this one. Then I was like, “WHERE HAVE YOU BEEN ALL MY LIFE???” (I may need intervention. But not yet, wait til this jar is finished, ok?)
Ok, before you ask, here’s some answers to the questions I know you are busting to ask:
- Yes, you can make them without a Thermomix (see conventional method in recipe)
- Yes, the ingredients are very simple – just water, gelatine, honey, vanilla and salt! (Make sure you use a good quality gelatine – I use the Changing Habits 100% organic gelatine available here)
- Yes, you can reduce the honey to taste, although the less you use, the less the marshmallows stand up to heat (e.g. if you’re wanting to toast them over the fire)
- Yes, you can use other sweeteners like maple syrup, rice malt syrup, or coconut nectar, although rice malt syrup and coconut nectar seem to give a heavier result and sometimes separate. I don’t think stevia or xylitol would work, sorry.
- Yes, they hold their shape in the fridge and don’t go soggy (in fact they are better after a day in the fridge!)
- Yes, they freeze well, and can be eaten straight from the freezer because they don’t go hard (although they are very chewy straight from the freezer… which is kinda fun!); but if you let them thaw out they will go back to being their soft, fluffy, original selves.
- Yes, they can be toasted over the fire, as long as you give them a bit of time to dry out after you cut them up, and don’t hold them over the fire tooooooo long (and over hot coals is better than over actual fire) – just brown them quickly then eat them! (See my video of testing the toasting here)
- Yes, they are perfect in hot chocolate (I tested it for you. Tough job but someone’s got to do it.)
- Yes, they are awesome in rocky road with my dairy free chocolate (I also tested that for you – so kind of me, I know! See my rocky road tips below.)
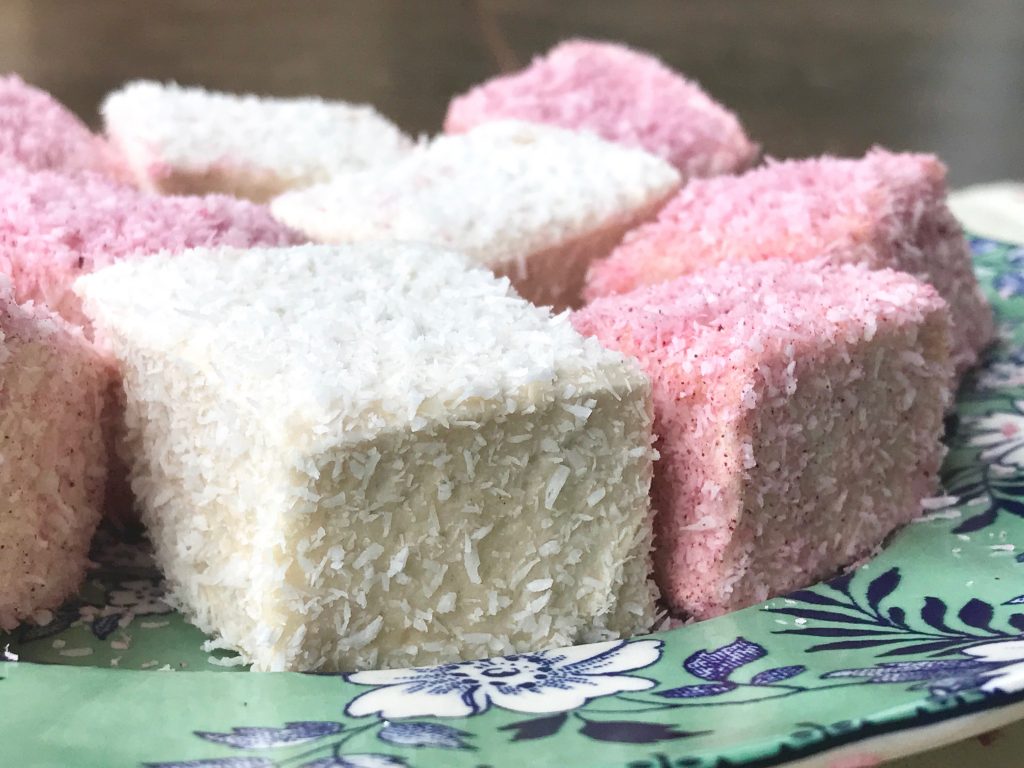
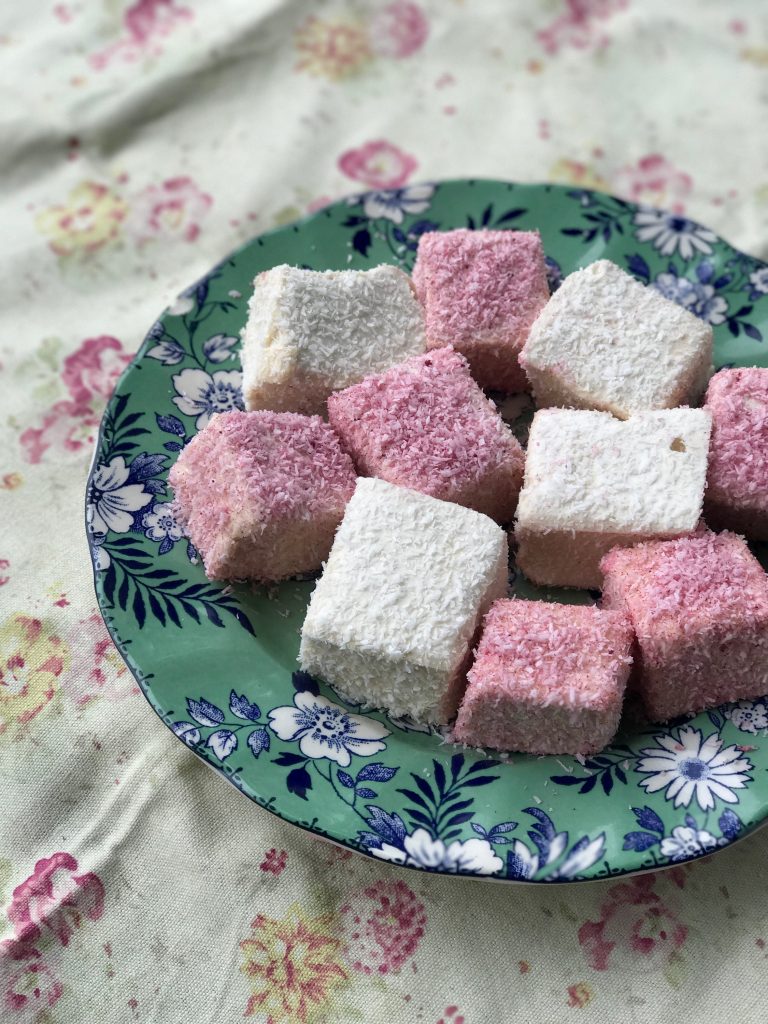
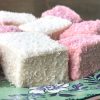
- Yes, you can roll them in coconut and it sticks well. And since they also hold their shape well, I’m sure they’ll work for bunny molds. 😀
- No, you can’t double the recipe in the Thermomix! It will overflow. (Think sticky mess everywhere…) Please don’t try it!
- And I’m sorry to have to break the news, but agar does NOT work in this recipe instead of gelatine. Vanessa tried it out for us, and said “Agar foams, it doesn’t set like marshmallow regardless of how much agar you use. The result is a thickish foamy air in your mouth…kind of like eating bubble bath!” So yeah, maybe not. :/

Feel free to share your marshmallow creations with us in my Facebook Chat Group, or on my Facebook page! We’d love to see them. And if you try any variations, please share your results!! Thank you 🙂
Love from Jo xx
PrintHoney Sweetened Marshmallows
Ingredients
250g (1 cup) filtered water
3 Tbsp organic gelatine powder (use a 20ml Tbsp)
200g raw honey (can be reduced further if you prefer)
1/2 tsp vanilla powder (or 1 tsp organic vanilla extract)
1/4 tsp sea salt
(For optional natural colours, and a version without vanilla, see Notes below)
Instructions
Thermomix Method:
- Prepare a baking dish by greasing with a little coconut oil and lining with baking paper. Leave some paper sticking up over the sides so marshmallows are easy to remove once set.
- Weigh water into Thermomix bowl, and carefully sprinkle in gelatine powder so that it sits on the surface of the water (not on the blades).
- Add honey, vanilla and salt and insert butterfly whisk. Place steamer basket onto lid instead of MC, so steam can escape.
- Cook 15 mins/115C/speed 1 for TM5/TM6 (or cook at Varoma temp if using a TM31). Keep an eye on the mixture as it cooks – if it begins to bubble up onto the lid, turn temp down to 100C until it subsides, then turn back up to 115C/Varoma.
- Once done, remove lid from bowl and allow mixture to cool to room temp (37C) before continuing! Add optional colourings once mixture has cooled.
- With butterfly attached and steamer basket on lid, mix 5-7 mins/speed 4, or until mixture is thick and glossy and holds its shape when on a spoon. Don’t overmix, as high heat will ruin the texture and make the marshmallows chewy and rubbery!
- Transfer the marshmallow to your lined dish, scraping from the bowl with a silicon spatula.
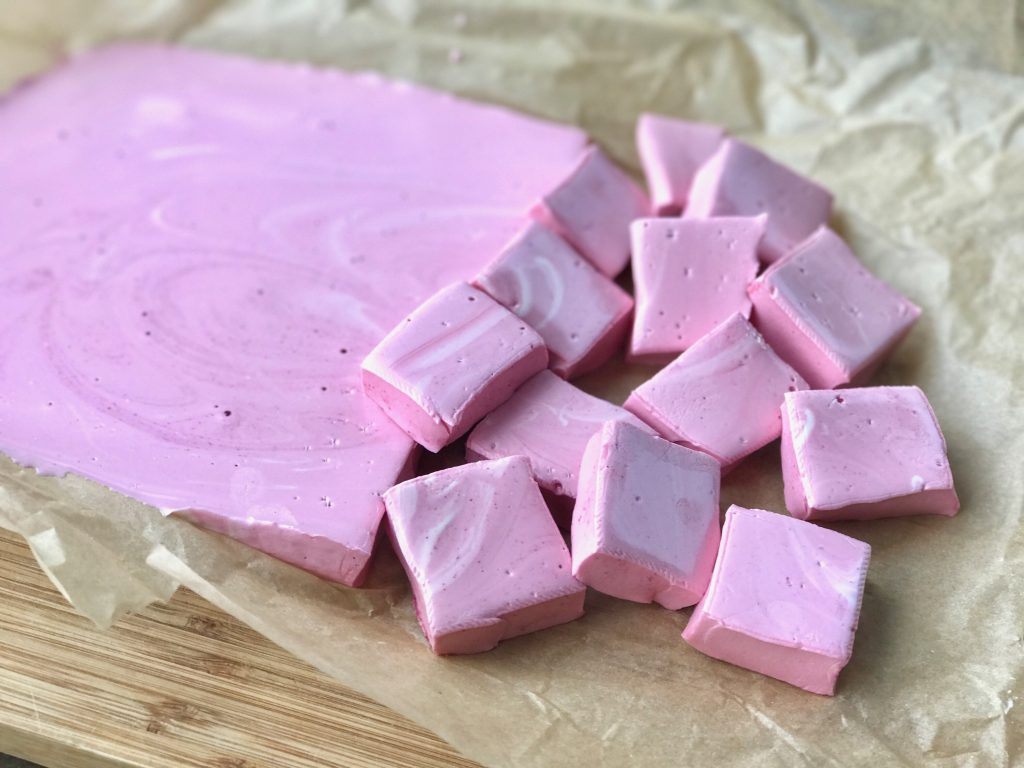
- Scrape the mixture into the lined dish with a silicone spatula, smoothing the top of the marshmallow. Place dish into the freezer to set for 30 minutes, or until firm.
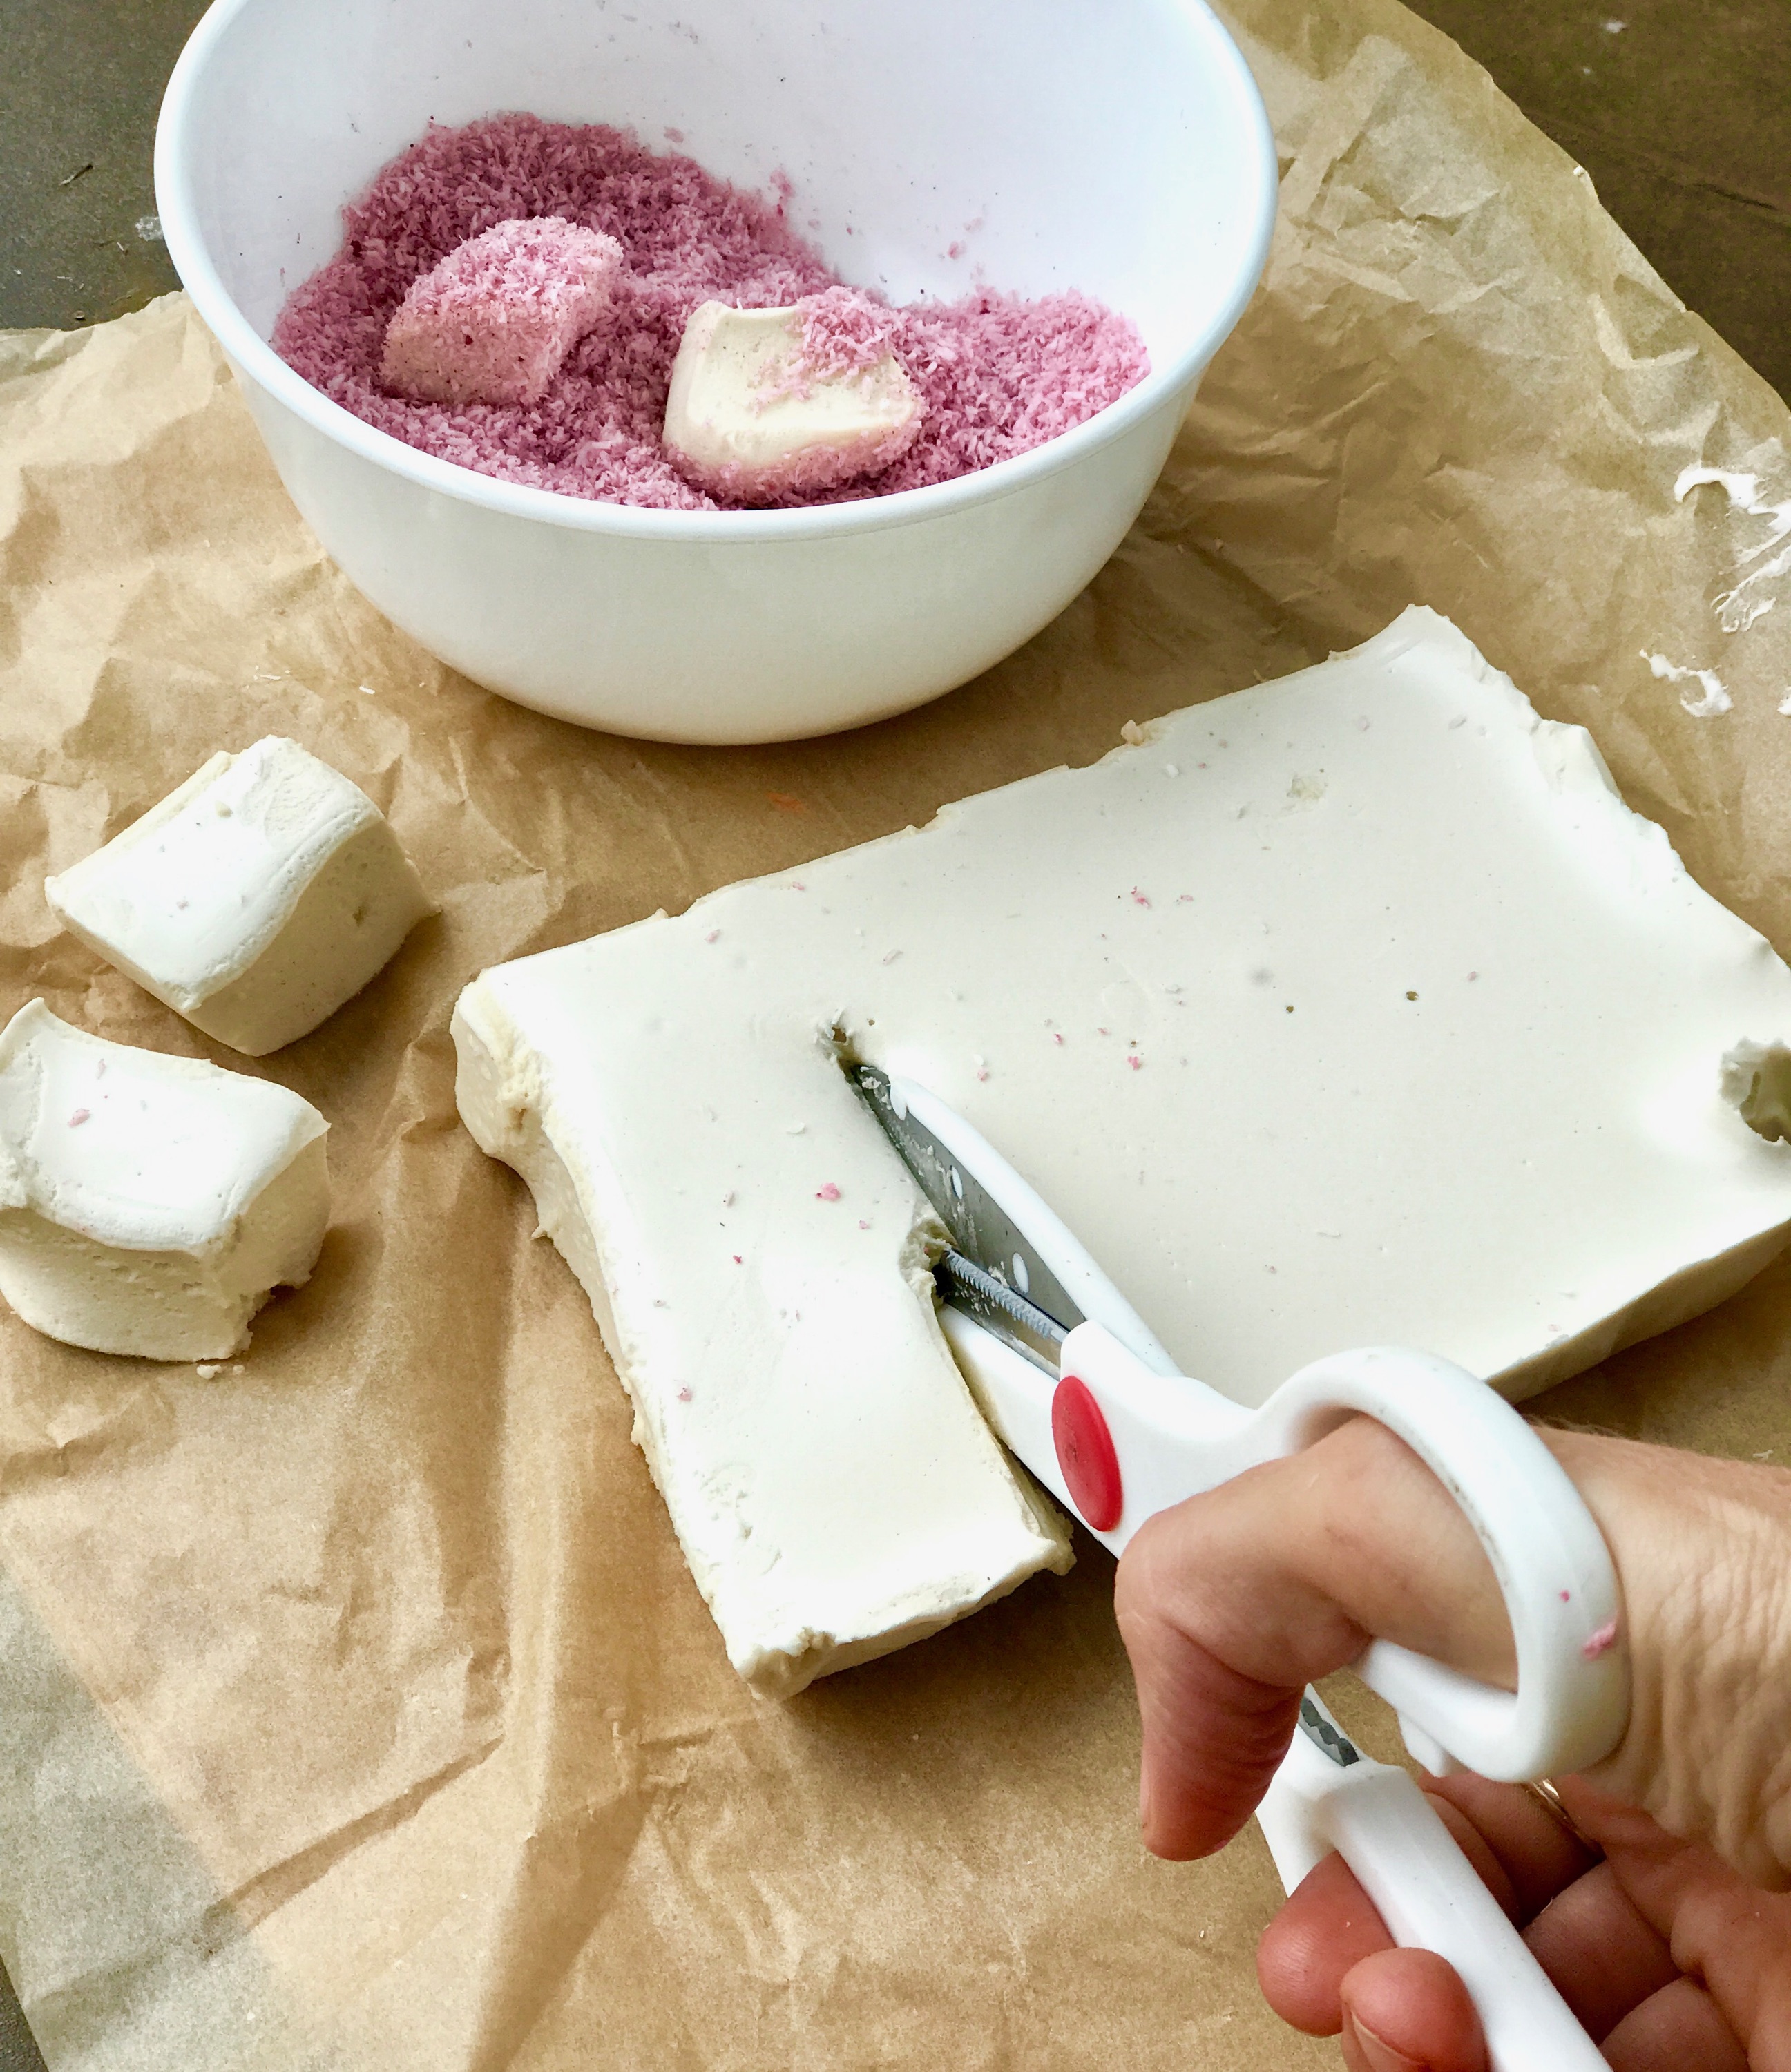
- Remove marshmallow from dish and discard paper. Cut marshmallow into approx. 4cm squares using kitchen scissors, or place onto a cutting board and cut with a very sharp knife.
Conventional Method:
- Grease a 26cm x 19cm baking dish with a little coconut oil and line with baking paper, leaving some paper extending over the sides to allow for easy removal.
- Place water and gelatine in a heavy-based saucepan over medium heat and add honey, salt and vanilla. Cook, whisking, for 7–10 minutes, or until gelatine is dissolved and syrup is clear and slightly reduced. Pour into the bowl of an electric mixer and set aside to cool to room temperature.
- Using the whisk attachment, begin mixing on medium–low speed, gradually increasing speed to high. Beat for 5–7 minutes, or until mixture is thick and glossy and soft peaks form when the whisk is lifted. Don’t overmix, as texture may become chewy and stringy!
- Using a silicone spatula, scrape mixture into prepared dish and smooth top. Freeze for 30 minutes to set.
- Remove marshmallow from dish and discard paper. Cut marshmallow into 4cm squares with kitchen scissors, or place on a chopping board and cut with a very sharp knife.
Notes
Optional – Natural Colours and Coatings:
· For a bit of fun, add a few drops of natural colour at the beginning of the whisking time, or add some colour to desiccated coconut, and toss the marshmallows through to coat.
· You can buy natural colours like Hopper Natural Colourings.
· Or get creative and make your own natural colours! Here’s some tips for making natural food colourings.
· Another option is to add powdered colours. I used 1 tsp beetroot powder in the pink marshmallows, and it made them taste amazing! I also tossed it through the coconut for pink coconut. You can make your own beetroot powder by drying thin slices of beetroot in a dehydrator for a couple of days, then grinding in the Thermomix to make powder.
· Toss through melted chocolate and roll in coconut for yummy ‘lamington marshmallows’ – you can use my chocolate recipe, here.
· Make Rocky Road for an extra special treat!! See tips below.
HAVE FUN!
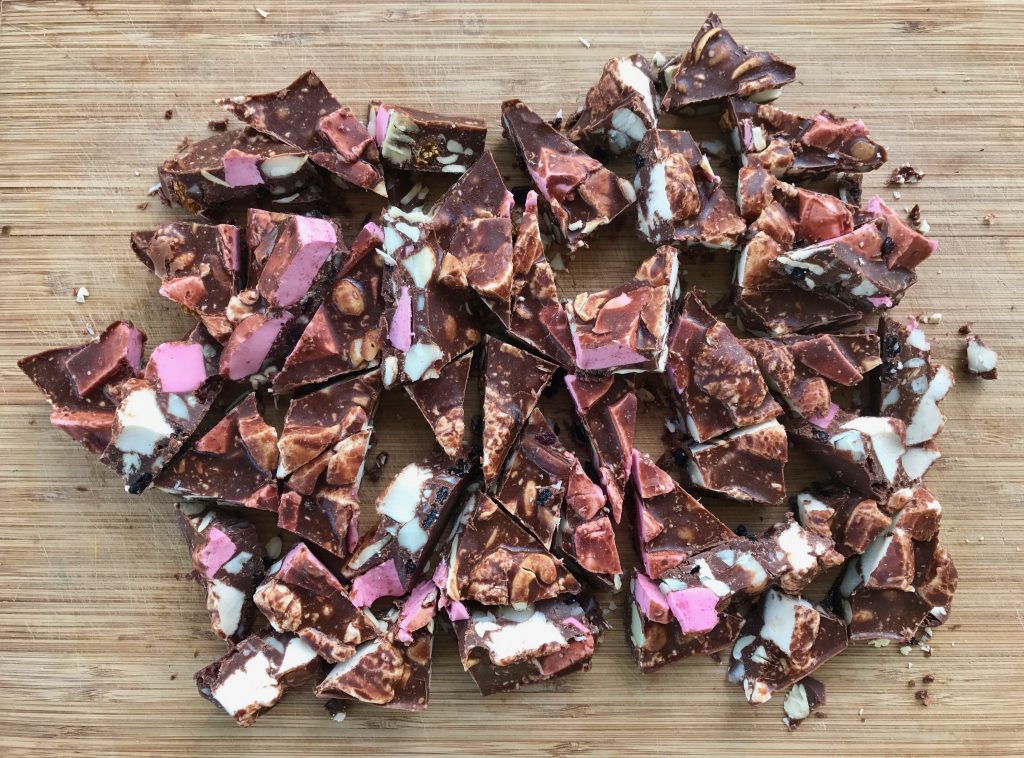
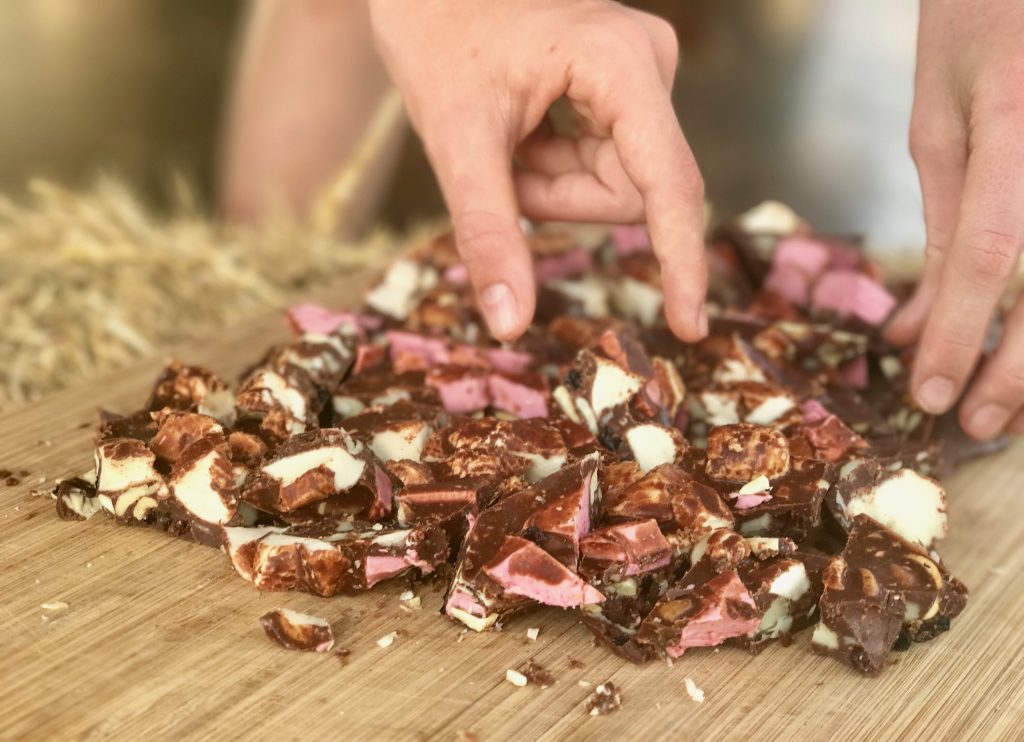
How to Make Rocky Road:
- Make my Dairy Free Chocolate recipe, except reduce honey to 30-50g. Or if you have our cookbook or app, Life-Changing Food, use the dairy free Nutty Chocolate recipe from that – sooooooo creamy and delicious! Allow the chocolate to cool to room temp as you prepare the remaining ingredients.
- Chop 100g each of pink and white TOASTING marshmallows roughly into 1-2cm pieces. Place into a large bowl.
- Add 100g each macadamias, pecans and cashews (or whatever nuts and seeds you like – for a nut free version use seeds and coconut flakes).
- Add 100g or so of dried fruit – I used currants and Inca berries. Mix the contents of the bowl well.
- Pour chocolate into bowl and mix well, then pour into a rectangular dish lined with baking paper.
- Pop into the freezer until set, then chop roughly on a cutting board.
- Store in jars or bags in fridge or freezer. (I won’t bother saying how long because it won’t last that long anyway.) 😉
Wow these were amazing! My kids and I loved them. You are right Jo they won’t last long in the fridge. Thank you.????
Great to hear Suzanne! 🙂 xx
Hi Jo, i made these last night and followed the recipe exactly in the TM51 and unfortunately mine split with a jelly forming at the bottom 🙁 I’m not sure what i did wrong? i followed the light and fluffy recipe and whipped the extra 5 mins at the end, consistency looked good and all. I added beetroot powder to make them pink – could that affect it? Was so excited to make Rocky Road with them 🙂 x
Hi Magdalena! 🙂 Did the mix cool completely before whipping? They will still work well in the rocky road…pretty sure you won’t be able to notice once they are mixed through the choc, etc. xx
Hi Jo,
So sorry never got the notification that you replied! You’re probably right I may have been a bit too eager and now I’m trying for a second time so have let the mixture cool completely ???? they still tasted delicious the first time around so all was not lost and you’re right in Rocky Road no one noticed hehe
Xx
Could I substitute raw sugar in place of the honey in this recipe? If so, how much sugar would be equivalent?
I don’t know if that would work, I think you’d need to reduce the sugar to a syrup first. Sorry!
I’ve tried these twice & I get a much smaller batch that doesn’t set even after 2 days ???? What am I doing wrong?
Hi Heidi! 🙂 Which method are you using? Also, make sure you allow the mix to completely cool before whipping and use a good quality gelatine.
I’m vegetarian- can I add agar instead? X
No sorry, agar does not work in this recipe. xx
Could you do flavored ones? I’ve seen recipes for raspberry & a gingerbread one for normal mallows
Yes, you sure could Tara! Yum! 🙂
Is it possible to take half out once done, add beetroot powder to the rest and then mix? I need pink and white marshmallows but don’t want to make 2 batches ????
I think it should be just fine;-)
I am wondering if these would work mixing in rice bubbles (or similar I can’t think the ones I have in the cupboard) to make ‘lcms’ for lunchboxes?
Hi Lisa! Yes, I think these would work well. Give it a try and let us know how you go. xx
Is it ok to use Himalaya salt instead of sea salt?
Yes, for sure! 🙂
Hi can this be melted and used for home made lcm bars with rice puffs ?
Yes, for sure…yum! 🙂
Do you know when making lcm bars if we have to let marshmallows set, then melt them and add to rice bubbles OR can we add to rice bubbles before it sets?
Yes, you can add the marshmallow as soon as you make it before it sets and stir through the rice bubbles. Make sure to do it quickly as it sets very fast.
Jo, if I wanted to be lazy, can I use an Organic Dark chocolate instead of making it for the Rocky Road? If I use a 70 – 85% dark chocolate, how much would I need? Thanks 🙂
yes, for sure;-). x
Every time I make the toasting marshmallows following the TM5 instructions in my TM5 the mixture burns and it sticks like glue to the bottom of my bowl. Why is this?
Hi, is there a vegan alternative to gelatin that can used for this recipe?
Sadly it doesn’t work with agar agar, we tried!
HI, I’m wondering how honey I can reduce without affecting the texture? most recipes need all the sugar to hold up
You actually can reduce the honey in this one and it still works really well! I’ve had feedback from people reducing it right back to about 30% saying it worked, so go ahead and adjust to taste. 🙂
If I reduced honey, should I reduce any another ingredient like water, gelatin..!!!!
No that’s fine! But if you reduce the honey too much it will just be less glossy, more of a firm marshmallow but delicious all the same!
OMG these are the best! I have a Magimix so adapted the recipe for that and they turned out absolutely perfectly! Going to make rocky road tomorrow, thank you for this awesome recipe!
For anyone else with a MM the only difference is you leave the cap off rather than using a steamer basket as a lid, and the speeds are 2a for the first step and 12 for the second step 🙂
Great tip. Thank you:-)
Thanks for that tip. I’ll be trying this recipe for the first time and have a Magimix.
Hi, I’m very confused. The Thermomix recipe says to cool to under 37 degrees. The conventional recipe says to poor the syrup in hot… I will be using the conventional recipe, and don’t want to risk it splitting as per comments if I put the syrup in too hot. Any and all clarification would be appreciated!
Hi Julie. We have now updated the recipe – in both methods the mixture needs to cool down before continuing:-).
had a bit of a fail didnt realise until too late that i had a vege gel-it-in.. just didnt whip.. used some freeze dried strawberry powder for colour & flavour … added my fail to ricebubbles and have very cool LCM bars. will get good quality geletin this week and try again..
Sounds delicious:-). Good luck with your next batch x
I made this today and it has come out like boot leather, tasty boot leather nonetheless. It’s ok I am going to try again and see where I went wrong. Halved the honey, would that have had anything to do with it not working?
It should still work even after reducing the honey…best to start with reducing it about 30% first and see how you go from there! Also make sure to cool the mixture before whipping. Good luck x
I don’t usually leave comments, but these were super delicious! I was excited to try it as I think store marshmallows are sickeningly sweet, but going from previous reviews I wasn’t sure it’d work. My gelatine didn’t dissolve well so I just gave it a quick mix before adding the other ingredients. End result? Perfectly fluffy, melt in your mouth marshmallows that have the perfect amount of sweetness in my books! And even better with some coconut! Thank you so much for sharing this recipe ????
Oh thank you so much, I’m so so happy you enjoyed them!!!
You can use stevia or erythritol but melt it in water first check out Elleherself on Instagram
Delicious! I made the fluffy marshmallows and had no issues with the recipe. I might reduce the honey next time, but otherwise very impressed. I think my 7yo and 2.5yo boys are going to devour these!
Thank you!
So glad you guys loved this one! You can reduce the amount of honey, however if you’re planning on roasting them over the fire, they’ll need the amount of honey specified as they need a syrup in the mixture to toast well over the flame. But if you’re just aiming for a ‘less sweet’ version that will still get fluffy, then reducing the amount of honey should be fine! Happy roasting!
Just made them added a touch too much of honey but it is delicious and so fluffy…..mmmh lots of hot chocolate in the next few days…
My family and I love this recipe! I have made 8 quantities in a week!
Finally something sweet I can eat and it’s healthy!
I made raspberry flavoured marshmallows by pureeing frozen raspberries, put them through a sieve (to remove seeds) and then I added about 6 tablespoons of this puree to the mixture as it whipped up in the mix-master. I got some lovely rippled swirls of pink colour, and a great raspberry flavour!
I also changed the method for vanilla marshmallows to try and retain the goodness of my precious raw yellow-box raw honey. I simmered the gelatine and water and vanilla, and added the honey when this had cooled to lukewarm then waited until it cooled a bit more before adding it to the mixmaster. It worked no differently to the original method, and the honey flavour was so much more intense!
I am working my way through the gaps friendly recipe’s on Quirky Cooking and in Life Changing Food, and having marshmallows for dessert!
Thanks a heap Jo!!!
Thankyou so much for this recipe! I really think adult eating habits are so linked to childhood nostalgia, much more so than Tate etc, so I try and give my kids healthy food happy memories but toasting marshmallows over a fire was one that had me stumped. Such good childhood memories to be had but soooo unhealthy. And sickening now. I googled it not expecting a solution. And bingo! Found this.
They were brilliant. And from the same author from my new favourite book “life changing food” where we have just discovered (ok become addicted to) the most amazing healthy chocolate recipe. We live in paris and have access to some of the “best” chocolatiers in the world. Honestly, they seem 2nd rate now. My life has just changed!! The 2 things I missed after giving up crappy food, are back and better now than ever!
For the marshmallows we wanted to make them pink but couldn’t find beetroot powder. But the health food shop had plenty of superfood berry powders in the food supplement section. I chose a mix I assumed would be pink (açaí berry, strawberry and banana) -popped some in the mix along with some real whole raspberries and blueberries. The results was a soft pink (enough to satisfy my pink obsessed child). We just licked the bowl and it was out of this world good!
Love these marshmallows and the Rocky Road is amazing!!!
Hi Jo, my syrup doesnt go clear even after 10-15 mins…. will this still work? Im doing conventional method.
xx
It may not look clear as honey makes it brownish, so don’t worry too much, and it will be fine once it fluffs up 🙂
Hi there,
Have been making these marshmallows for over a year now and my daughter loves! I was using a recipe that was up here and must have changed sometime in the last three or so months? I use the conventional method and was putting everything in at the start, then cooling and beating? It was super easy and working well, are you able to post or email that recipe for me to save please?
Hi Melissa! The simpler version of the conventional method is the one I worked out while testing for my new cookbook, Simple Healing Food. I have recently updated this recipe to be the same as the book – sorry I forgot to do it straight away! (I’m guessing you may have used the book version then gotten confused by the old version on the blog? Anyway, fixed now!!) x
Hi Jo!
Marshmallows are delicious and the recipe was so easy, thank you! We made the toasting marshmallows and while delicious they melted rather than toasted over the fire. I cut and dried them out as the recipe suggests. Only thing, I didn’t leave in the fridge overnight- more like 4-5 hours. Think that’s where I went wrong?
Thanks!
It might need a little more time to dry out to toast!
My first batch is not becoming into soft peaks, what should I do?
Is the mixture cool enough? Because it won’t whip properly if it’s warm, so maybe cool it some more and give it a go!
Pingback: Gluten Free Gingerbread Men - Quirky Cooking
Jo, I’m not sure what’s happening but I waited till both my batches cooled to 37degrees in my Thermomix but they both did not become think more runny and I’ve put them in the freezer to see if they will set but I don’t think it’s going to happen.
So sad! My boys were so excited to make rocky road with them. Maybe I need to make sure the mixture is no heat at all. Really wish I didn’t stuff it up twice . The ingredients are not cheap
Hi Rebekah! Here’s a video link of how to make the marshmallows, if you’ve followed these steps and it hasn’t worked out for you, send us an email and we’ll trouble shoot with you! If the mixture is still in the freezer, you can still melt it up again and whisk it to get it fluffy! I hope it works out! https://www.instagram.com/reel/COmeGXHjylL/
I was a little impatient and started mixing at 45 degrees.. sadly it remained liquid.
That’s ok, just let it cool down to 37C and then whisk. Or if you need to you can melt it again, cool it to 37C, then whisk again and it will be fine.
What is the best way to store these?
In the freezer or fridge 🙂